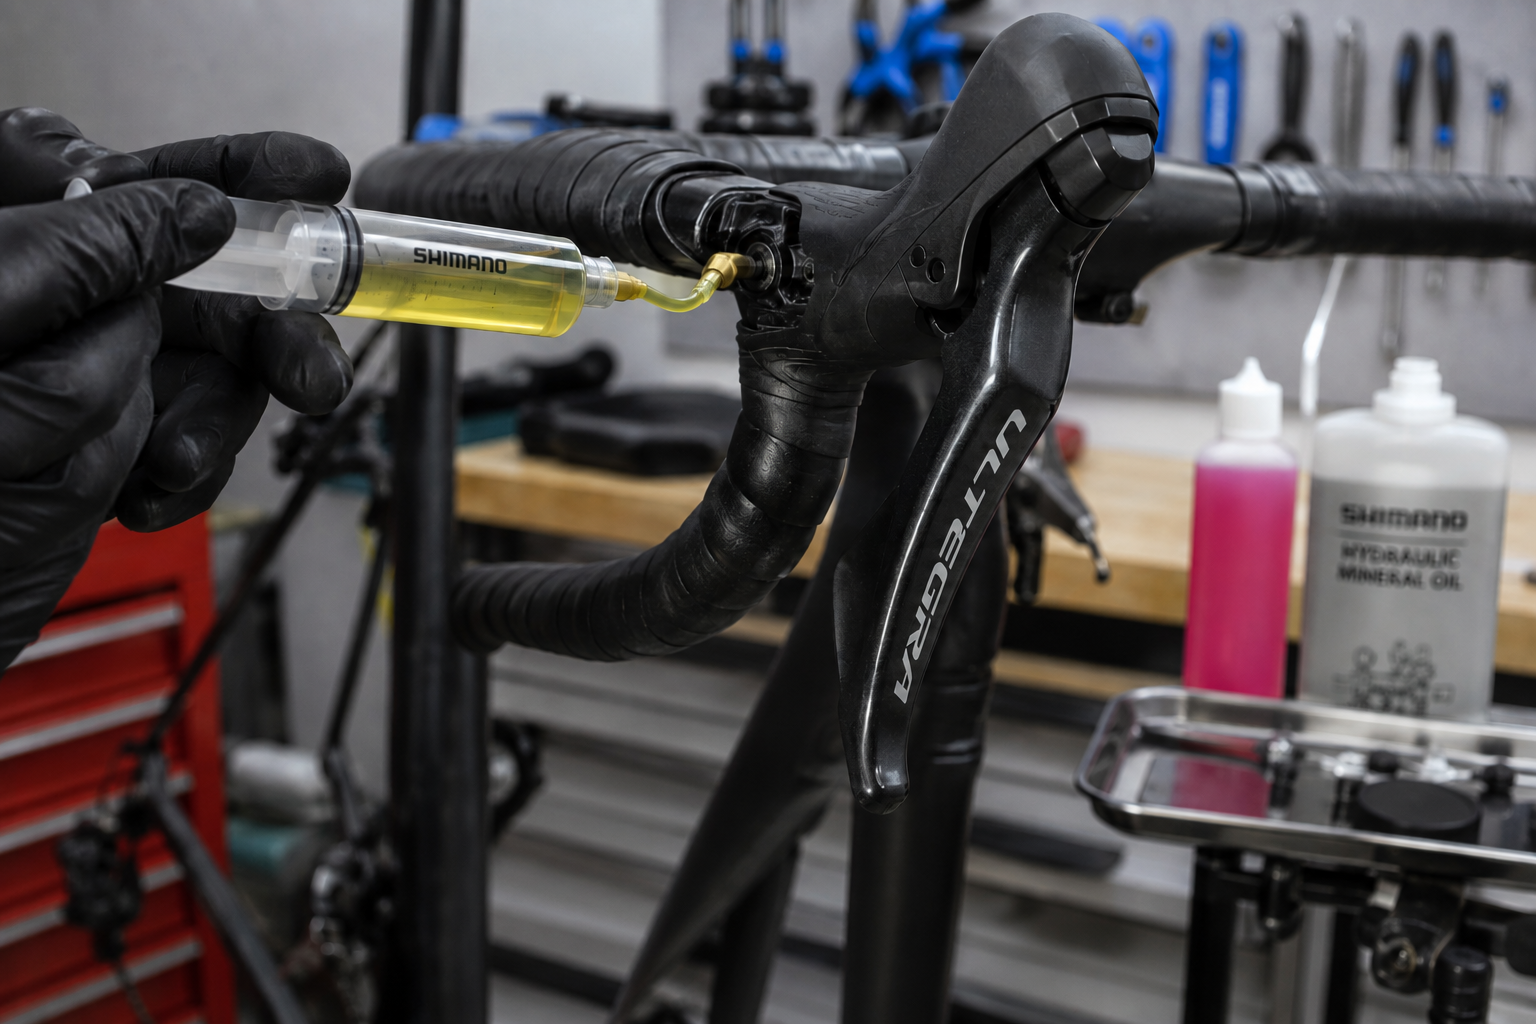
A brake lever that pulls further than usual, a spongy feel, or less firm braking despite brake pads that are still in good condition: these symptoms almost always indicate the presence of air in your hydraulic system. Brake bleeding, often perceived as an intimidating operation, is actually quite manageable at home with the right equipment and a methodical approach. This guide takes you through the process step by step, whether you have a Shimano or SRAM system.
For a complete overview of road bike braking systems, see our complete road bike brake guide. If you are still unsure whether to choose disc or rim brakes, our disc brakes vs. rim brakes comparison explains the key differences.
1. Why and when to bleed your hydraulic brakes
A hydraulic brake system works with an incompressible fluid that transfers the force from the brake lever to the caliper pistons. Over time, small amounts of air can gradually enter the system: micro-bubbles generated by brake pad wear, temperature variations that cause the system to expand and contract slightly, or the natural permeability of the brake hoses, which allows tiny amounts of moisture and air to enter over the course of several months.
Unlike brake fluid, air is compressible. Its presence in the system causes that spongy brake lever feel, with increased lever travel and braking power that becomes less immediate and predictable.
Key takeaway: plan on bleeding your brakes once or twice a year with regular use, or as soon as the first symptoms appear. Intensive use or frequent mountain descents will generally accelerate the need for a brake bleed.
2. Shimano or SRAM: identify the correct brake fluid before you start
This is the most critical point in this article and should be checked before carrying out any work. Shimano uses mineral oil in its braking systems, while SRAM and most other brands use DOT brake fluid.
Safety warning: never mix mineral oil and DOT brake fluid, or use one in place of the other. This mistake can damage the internal seals of the system and may require complete replacement of the caliper or brake lever. Always check your brake model and specification before purchasing your bleed kit and brake fluid.
3. The equipment you need
Before you start, gather all the necessary equipment to avoid having to interrupt the process:
- A bleed kit specifically designed for your brand and model, including the appropriate syringes and fittings.
- The correct fluid for your system: mineral oil for Shimano, DOT fluid for SRAM and compatible systems.
- A Torx or Allen key, depending on the type of bleed screw fitted to your caliper.
- Clean cloths and protective gloves.
- Ideally, a bike repair stand to keep the bike stable and allow you to work at a comfortable height.
4. How to bleed Shimano hydraulic brakes step by step
- Position the bike so that the brake lever is horizontal, with the reservoir facing upwards.
- Remove the reservoir cap from the brake lever and replace it with the bleed funnel supplied with the bleed kit.
- Connect the lower syringe to the caliper bleed screw, after opening it, and connect the upper syringe to the bleed funnel at the brake lever.
- Inject the fluid from the bottom by gently pushing the caliper syringe to force the fluid and air upwards towards the brake lever reservoir.
- Gently tap along the brake hose with a screwdriver or your fingernail to dislodge any air bubbles that may be trapped against the inner walls.
- Close the caliper bleed screw once the fluid runs clean and no visible air bubbles remain, then remove the lower syringe.
- Remove the bleed funnel, reinstall the reservoir cap, and carefully clean any remaining fluid from the brake lever, caliper, and rotor.
5. How to bleed SRAM hydraulic brakes (or DOT systems) step by step
The general procedure is similar to the one described for Shimano, with a few specific differences to keep in mind when working with a DOT system:
- Position the bike and prepare your equipment as you would for a Shimano system, but this time use the SRAM-specific bleed kit and fittings.
- Connect the syringes to the brake lever and caliper according to the access points specified by the manufacturer, which are generally similar in position to those found on Shimano systems.
- Inject the DOT fluid from the bottom by pushing gently while monitoring the upper syringe for the appearance of air bubbles.
- Tap along the brake hose to dislodge any remaining air bubbles, paying particular attention to bends in the hose where air tends to accumulate.
- Close and clean the system, making sure to wipe away any traces of DOT fluid, which can damage the frame's paintwork if left in contact with it for an extended period.
Key takeaway: DOT fluid is hygroscopic, meaning that it absorbs moisture from the air over time, which gradually reduces its performance. Do not reuse a bottle that has been open for several months, and keep it tightly sealed between uses.
6. Common mistakes to avoid
- Mixing different types of fluid: this is the most damaging mistake and should always be checked before you start.
- Pulling the brake lever while the system is open: this pushes the fluid and causes the pistons to move out without anything to stop them, creating the same risk described in our article about the disc brake pad spacer.
- Failing to properly tighten the bleed screw: insufficient tightening can lead to a gradual fluid leak and allow air to re-enter the system.
- Reusing DOT fluid that has been open for a long time: absorbed moisture reduces its performance and can compromise the effectiveness of your brake bleed.
7. When to have a bike shop bleed your brakes instead of doing it yourself
Brake bleeding is generally a manageable job at home, but certain signs should prompt you to seek professional help rather than repeatedly attempting the procedure yourself:
- The brake lever remains spongy after a complete and properly performed bleed.
- A fluid leak appears around the caliper or brake lever.
- The hydraulic system has been accidentally opened, for example following a cut or damaged brake hose.
In these situations, a bike shop has the diagnostic tools and replacement parts needed to resolve the problem more quickly and without risking further damage to the system.