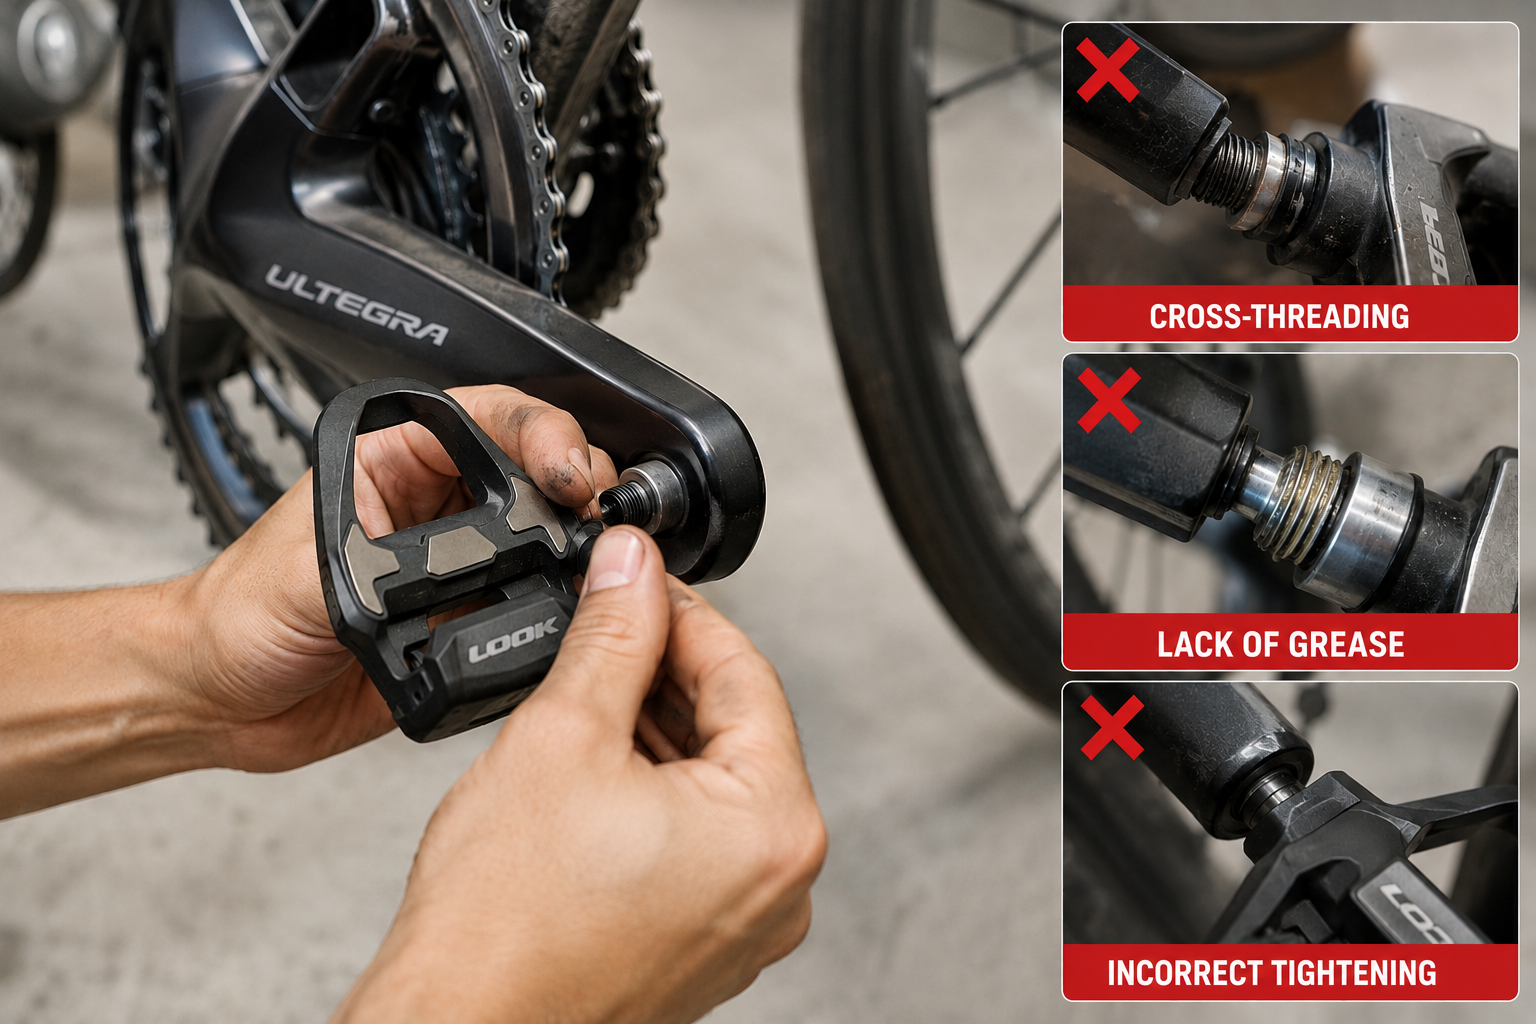
Changing your bike pedals may seem simple, but certain installation mistakes, even when made just once, can permanently damage the crankset threads. The crankset is considerably more expensive and complex to replace than a simple pair of pedals. It is far better to know about these mistakes before reaching for a wrench than to discover them afterwards, once the threads have been damaged. This guide reviews the most common mistakes and their real-world consequences.
For the complete step-by-step installation procedure, see our guide on how to change your road bike pedals. For technical details on threading and tightening torque, see our complete road bike pedal guide.
1. Why the crankset is more fragile than you might think
The crank arm threads, generally made of aluminum and sometimes carbon, are significantly softer than the steel axle of the pedal that screws into them. In the event of incorrect handling, it is therefore almost always the crankset that wears or deforms first: the harder pedal axle will generally emerge from a forced installation virtually undamaged.
This relative fragility has a tangible cost: replacing a pair of pedals is a relatively limited expense, whereas replacing a complete crankset, or even just the crank arms if they are sold separately, represents a considerably higher cost, not to mention the time the bike may be out of service.
Key takeaway: the vast majority of thread damage can be avoided. It is almost always caused by applying excessive force at the wrong time, rather than by a manufacturing defect in the crankset or pedal.
2. Mistake No. 1: reversing the tightening direction between the right and left sides
This is the best-known mistake, but also the most destructive when it occurs. The threads are reversed on the two sides of the crankset: screwing the pedal in the wrong direction, without realizing it, gradually forces the crank arm threads out of shape with every additional turn.
Warning sign to recognize: unusual resistance during the very first turns of the thread is never normal and should immediately prompt you to stop. A properly aligned thread should turn freely by hand for the first two or three turns, without any significant effort.
3. Mistake No. 2: installing a pedal without grease
Without lubrication, the aluminum threads of the crank arm can gradually become slightly "bonded" to the steel pedal axle due to the combined effects of time, road vibrations, and sometimes minor corrosion caused by moisture. The result: removing the pedal later becomes very difficult, and sometimes even impossible without damaging the crank arm by applying excessive force.
If you are already experiencing this type of seizure with an existing pedal, our article pedal cleat squeaking or seizing explains how to diagnose and deal with the situation before it gets worse.
4. Mistake No. 3: forcing a pedal onto a resistant thread
When a pedal is difficult to screw in, the natural reaction is often to apply more force rather than stop and work out why. It is precisely this reaction that can turn a simple installation mistake into actual material damage.
It is important to distinguish between two types of resistance. Gradual and consistent resistance at the end of the installation, when the pedal reaches the point where it seats against the crank arm, is normal and expected. On the other hand, abnormal resistance from the very beginning of the installation, before the pedal has even approached its final position, almost always indicates a problem (incorrect direction, damaged threads, or misaligned threads) that must be identified before proceeding.
5. Mistake No. 4: excessive tightening torque, especially on carbon cranks
Tightening "a little harder just to be safe" is another common mistake, with particularly serious consequences for carbon crank arms. Excessive tightening can cause the threads to crack or lead to localized delamination of the carbon around the tightening point. This is structural damage that can compromise the safety of the crank arm, not merely its appearance.
Recommended guideline: the recommended tightening torque is generally between 35 and 40 Nm, as indicated in our main guide. For carbon crank arms in particular, using a torque wrench is strongly recommended instead of tightening "by feel", which remains imprecise even for an experienced mechanic.
6. Mistake No. 5: neglecting the condition of the threads before reinstallation
One less obvious but equally important point: installing a new pedal on threads that are already slightly damaged, without checking them beforehand, can worsen the existing problem instead of starting with a sound foundation. A burr or slight deformation that is overlooked during installation can become more pronounced with each new tightening and removal cycle.
Before reinstalling a pedal, a quick visual inspection of the crank arm threads, combined with running a fine cloth through the threads to detect any irregularity by touch, can help identify a problem before it gets worse.
7. What should you do if the damage has already been done ?
If you notice that your threads are already showing signs of damage, all is not necessarily lost:
- Threads slightly damaged but still functional: a dedicated thread repair tap can often be used to cleanly restore the existing threads. This is an operation that can be carried out by a bike mechanic equipped with the appropriate tools.
- Severely damaged threads: a threaded insert repair (such as a Helicoil) may still be possible on certain cranksets, creating a new thread inside the damaged one. If this solution is not suitable, replacing the affected crank arm, or even the entire crankset, may become necessary.
Advice: in all cases, seeking professional advice before attempting to repair an already damaged thread yourself is the safest approach. This helps prevent further damage and avoids turning a straightforward repair into an irreversible problem.