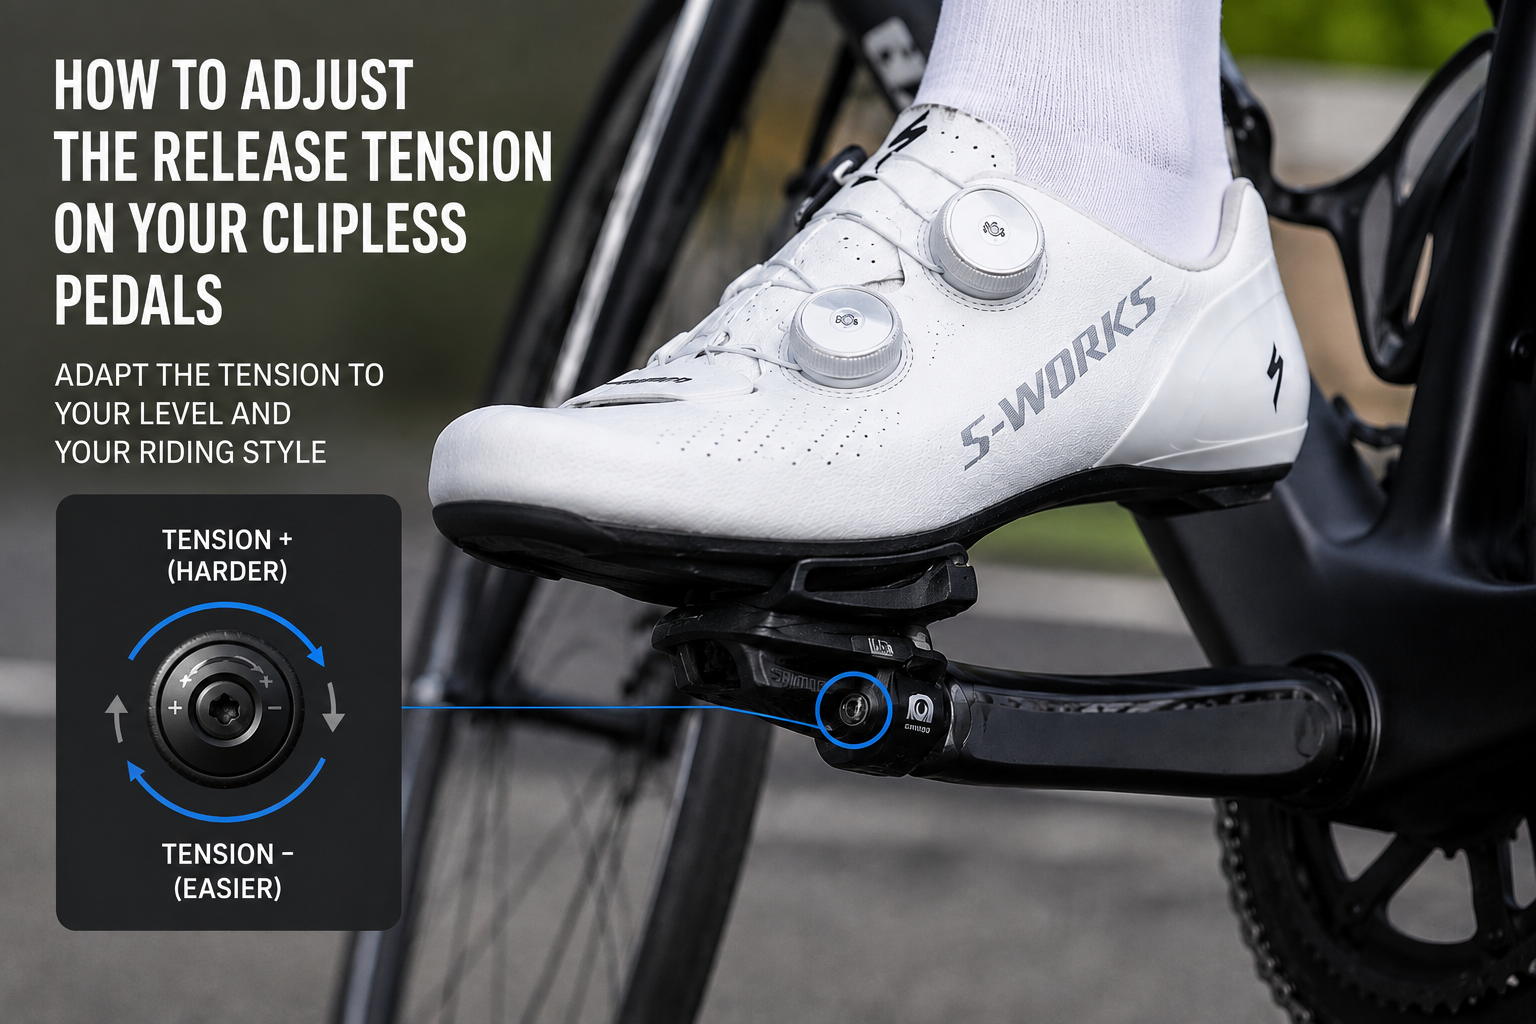
Release tension is a simple adjustment that is often overlooked or misunderstood, yet it directly affects both the comfort and safety of your pedaling. If it is too loose, the cleat may release unexpectedly during a ride; if it is too tight, unclipping becomes more difficult when you need it most, whether at a stop or in an emergency. The good news is that this adjustment only takes a few minutes, using a simple screwdriver or Allen key depending on your pedal model. This guide shows you how to adjust it step by step.
For other criteria when choosing and maintaining your pedals (weight, attachment system, lifespan), see our complete road bike pedal guide.
If your pedal is unusually difficult to clip into or unclip from despite having the correct release tension setting, the problem may lie elsewhere: see our article bike cleat squeaking or sticking: causes and solutions.
1. What is the purpose of adjusting release tension ?
On all clipless pedals, a screw (either a star-shaped screw or an Allen-head screw, depending on the brand) allows you to compress a spring housed in the pedal body to a greater or lesser extent. The more this spring is compressed, the more force you need to apply with your heel to release the cleat: this adjustment determines how firmly the foot is held in place.
Depending on the setting, there are two opposite risks. Release tension that is too low increases the risk of accidentally unclipping during pedaling, which can result in a loss of power and momentarily unbalance the cyclist. Conversely, release tension that is too high makes it more difficult to unclip quickly, particularly in an emergency situation while stopped (at a red light or when facing an unexpected obstacle), increasing the risk of falling because there may not be enough time to release the foot.
Key point: there is no universal setting. The right tension depends on your body type, experience, and riding style, and should be found through gradual adjustments rather than immediately opting for the maximum setting.
2. What tension should you choose based on your profile ?
The optimal setting varies depending on your experience level and type of riding:
- Beginners or riders returning after a long break: choose a low to moderate tension while you regain your clipping-in and unclipping reflexes without having to consciously think about them.
- Regular riding, sportive cycling: moderate tension provides a good balance between foot retention and ease of release, making it suitable for most rides.
- Racing, frequent sprints, out-of-the-saddle efforts: a firmer tension reduces the risk of accidental release under high loads, provided you already have good control of the unclipping motion.
In all cases, it is better to start with a relatively loose setting and gradually increase the tension over the course of several rides, rather than doing the opposite.
3. Tools required
Adjusting the release tension does not require any brand-specific tools, unlike some other more technical bicycle maintenance tasks. You simply need:
- A small flat-head or Phillips screwdriver, depending on the type of screw used on your pedal model.
- A 3 or 4 mm Allen key, which is the most common size depending on the brand.
- Ideally, a work stand to keep the bike stable while making the adjustment, or the help of another person to hold the bike during your first clipping-in and unclipping tests.
4. Step-by-step adjustment
- Locate the adjustment screw: its position varies depending on the brand (see the table below). It is always located on the pedal body, never on the cleat itself.
- Note the starting position: before making any adjustments, count the number of turns or visually note the current position of the screw so that you can return to the original setting if the new adjustment does not suit you.
- Adjust in small increments: turn the screw by no more than a quarter turn at a time. Making a large adjustment all at once makes the result unpredictable and difficult to assess.
- Test clipping in and unclipping while stationary: with one foot on the ground, and the bike stationary or secured on a work stand, clip in and unclip several times in succession to assess the resistance before riding.
- Confirm the setting under real riding conditions: take a short ride at low speed, preferably on an open and unobstructed area, to confirm the adjustment before returning to normal riding.
5. Adjustment by system (Look, Shimano, Time)
The location of the adjustment screw and the direction of adjustment vary slightly from one brand to another.
| System | Adjustment screw location | Direction of rotation for increased tension |
|---|---|---|
| Look Keo | Screw at the rear of the pedal body | Clockwise (tightening) |
| Shimano SPD-SL | Adjustment screw on the side of the pedal | Clockwise (tightening) |
| Time Xpresso / Iclic | Adjustment integrated into the floating mechanism | More limited adjustment range, with less pronounced fine-tuning than on the other two systems |
To learn more about the specific characteristics of each system, see our dedicated guides: Look road bike pedals, Shimano road bike pedals, and our guide to Time road bike pedals.
6. Mistakes to avoid
- Setting the same tension on the right and left pedals without checking: asymmetrical wear of the spring or cleat may justify a slightly different setting on each side.
- Tightening to the maximum "to make sure you never unclip": this approach is dangerous, goes against the safety principle discussed above, and makes it more difficult to unclip in an emergency situation.
- Never testing while stationary before riding: a setting that has not been tested with your foot on the ground can lead to unpleasant surprises during the first few meters.
- Confusing sticking with a simple release-tension adjustment issue: if the resistance remains abnormal after setting the tension correctly, the problem is probably elsewhere (wear, lack of lubrication). See our article bike cleat squeaking or sticking: causes and solutions for a complete diagnosis.