Riding in the rain or on wet roads is part of the challenges of road cycling. Fortunately, there's a simple, affordable, and customizable solution: making your own road bike fender . Whether you're a DIY enthusiast or just want to protect your drivetrain and clothing from splashes, here’s a detailed guide to creating an effective and lightweight bike mudguard, tailored to your frame’s specific needs.
Why install a fender on a road bike ?
A bike fender plays a crucial role in shielding you from water, mud, and road debris. By making one yourself, you can perfectly adapt its length, width, and shape to your road bike frame, which is often narrower than a mountain bike or city bike.
Main benefits:
-
Protects your drivetrain (chain, cassette, derailleur)
-
Keeps your clothes cleaner
-
Improves comfort during long winter rides
-
Fits narrow road tires, typically ranging from 25 to 32 mm width
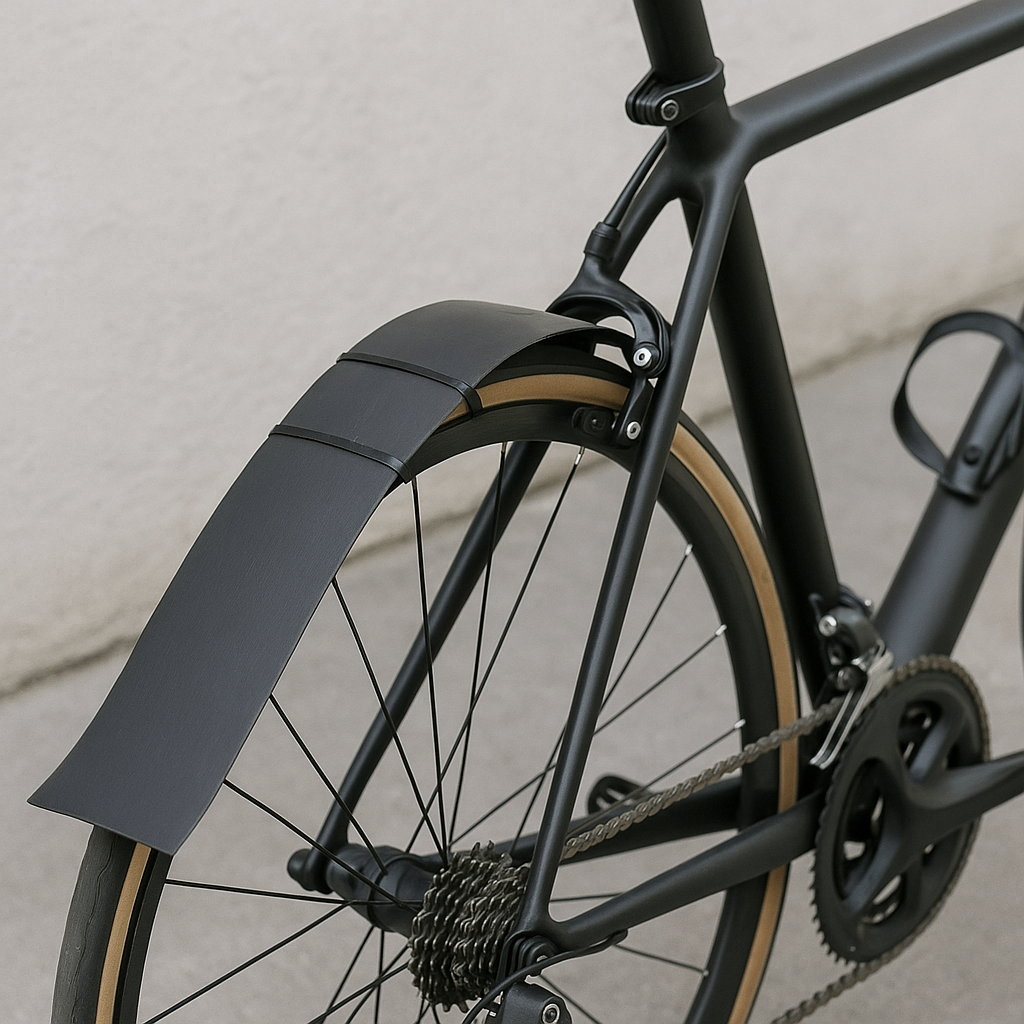
Key features of a road bike fender
Before starting the build, it’s essential to understand the technical characteristics of a fender suitable for road cycling:
-
Lightweight: use thin materials to avoid adding unnecessary weight.
-
Slim profile: a too-wide fender may rub against tires or limit wheel clearance.
-
Discrete mounting system: minimal fasteners compatible with frames without eyelets.
-
Optimal coverage: ideally, a rear fender should cover at least the top third of the wheel to reduce back spray, while a front fender protects your feet and drivetrain.
Materials you’ll need to make your road bike fender
For a simple and lightweight DIY project, here are commonly used materials:
-
Flexible plastic sheet (polypropylene or PET): think of an old binder cover, a rigid plastic bottle, or a construction site container.
-
Zip ties or Velcro straps: quick and secure attachment to seat stays or fork.
-
Old inner tube pieces: perfect for protecting the frame from friction.
-
Water-resistant adhesive tape or double-sided mounting tape: for extra stability.
-
Scissors, box cutter, and drill: for cutting and making small holes.
Step-by-step guide: how to make a road bike mudguard
1. Take measurements
Start by measuring the clearance between your tires and frame, as well as the desired length to cover the spray zone. General guidelines:
-
Rear: 30 to 40 cm (12 to 16 inches) long
-
Front: 20 to 30 cm (8 to 12 inches) to protect pedals and bottom bracket area
2. Cut the material
Outline the shape of your future bike mudguard. Opt for a narrow profile with a slight curve to follow the wheel shape. The ideal width is 30 to 40 mm (1.2 to 1.6 inches), depending on your tires.
3. Prepare the mounting points
Drill two or three small holes to pass the zip ties through. For a removable version, you can use Velcro or quick-release straps.
4. Install the fender
Firmly attach the rear fender to the seat stays or seat post, ensuring it doesn’t touch the wheel. For the front, fix it under the fork or down tube with a tight, vibration-free fit.
5. Test and adjust
Spin the wheel by hand to ensure there’s no rubbing. If needed, adjust the curvature or trim the length.
DIY alternatives: bottle fender, inner tube mud flap, or laminated cardboard
For occasional wet rides, some cyclists go for ultra-minimalist solutions:
-
Saddle-mounted mudguards (like "Ass Savers") cut from a plastic bottle or similar.
-
Front mud flaps made from a stretched piece of old inner tube under the fork.
-
Laminated cardboard fenders, quickly attached for temporary use.
Conclusion
Making a road bike fender is a great way to customize your gear while saving money. With a few basic tools and a little time, you can effectively protect your bike and improve your comfort on wet rides. For those who love neat finishes, you can even paint or decorate your creation with reflective stickers or colorful stripes !